
Home security is more important than ever. Bullet cameras are a popular choice for monitoring your property. But mounting them can be a challenge, especially if you want a clean look, adjustable angles, or a custom fit. That’s where the 3d print bullet camera holder solution comes in. By using a 3D printer, you can create a secure, personalised mount for your bullet camera that fits exactly where and how you need it.
Why 3D Print a Bullet Camera Holder?
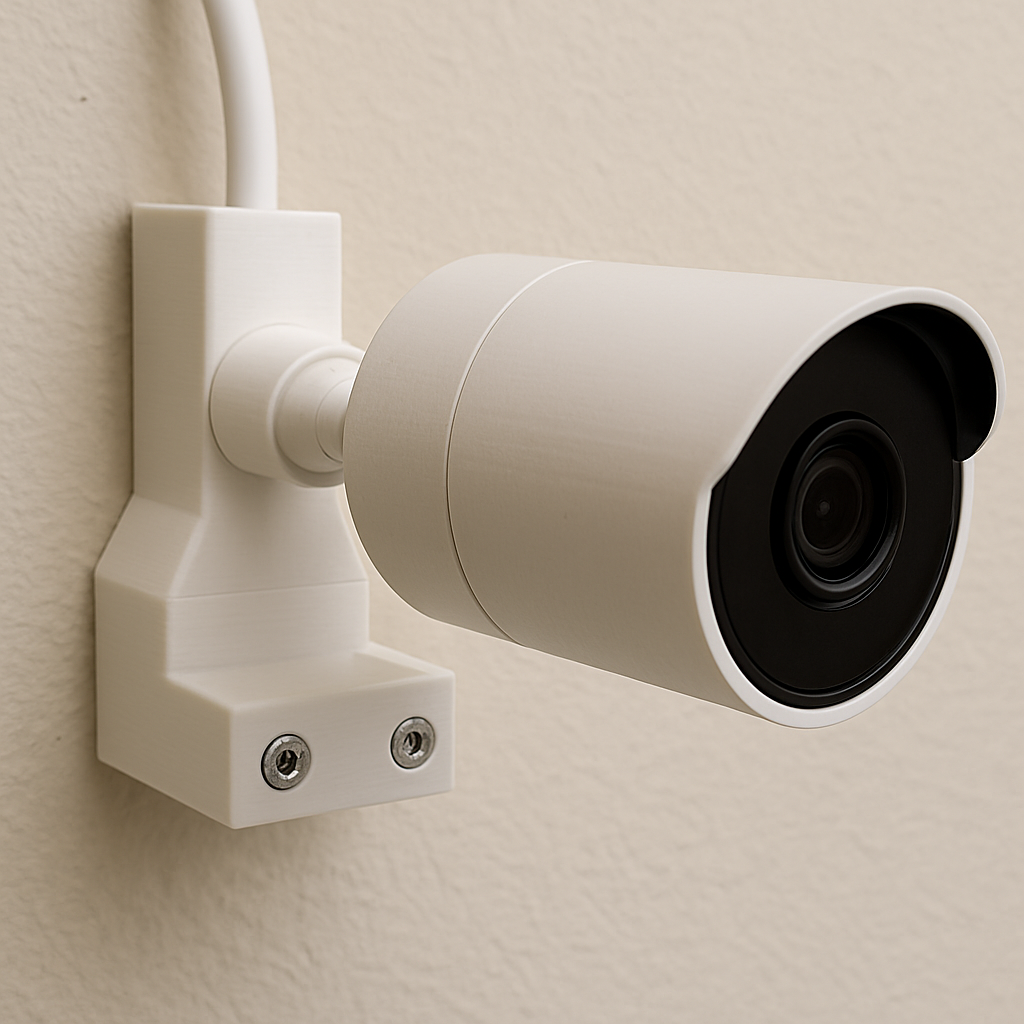
3D printing your own bullet camera mount gives you control. Most store-bought mounts are generic. They may not fit your camera or space well. With a 3D printed holder, you decide the shape, size, and features.
Here’s what makes this approach smart:
- Custom fit for your camera model
- Adaptable to indoor or outdoor use
- Strong yet lightweight design
- Clean, minimal look for better aesthetics
- Easy to install and replace
- Cost-effective alternative to branded mounts
You also avoid the hassle of drilling unnecessary holes or dealing with bulky commercial brackets.
Key Design Features for a Good Holder
Before printing, consider these design elements to make your camera holder truly useful:
- Swivel or tilt function
- Allows you to adjust your camera angle after mounting.
- Mounting holes or screw slots
- Make installation easier on walls or ceilings.
- Cable channel or pass-through hole
- Helps route power or Ethernet cables neatly.
- Weather protection flaps
- If used outdoors, small flaps can shield connections from rain.
- Snap-lock or quick-release base
- Speeds up installation and removal.
Each design should focus on both function and security.
Best Materials to Use
Choosing the right filament is important. You want durability, especially for outdoor use.
Recommended materials:
- PETG: Excellent balance of strength, flexibility, and UV resistance. Ideal for outdoor mounting.
- ABS: Strong and heat-resistant. A good option, but it requires an enclosed printer to avoid warping.
- ASA: Similar to ABS but better for weather exposure. Commonly used in automotive parts.
- PLA: Suitable for indoor use. Easy to print, but not ideal for direct sun or rain exposure.
If your camera will be indoors, PLA works fine. But for long-term outdoor use, PETG or ASA is better.
Tips for Successful 3D Printing
- Use a brim or raft to help the base stick during printing.
- Set your infill to 50-100% for added strength.
- Make sure your layer adhesion is solid, especially for load-bearing parts.
- Design for M4 or M5 screws, which are standard for mounts.
Always test-fit your holder before final installation.
Where to Find or Create 3D Models
There are many websites offering free and paid STL files. Look for terms like:
“bullet camera mount STL” or “CCTV holder 3D print”
Or design your own using tools like:
- Tinkercad (beginner-friendly)
- Fusion 360 (more advanced)
- FreeCAD (open source)
Even simple designs can go a long way in creating an effective mount.
Compatible Camera Brands
Many 3D printed holders can be adapted for popular brands like:
- Reolink
- Hikvision
- Dahua
- Amcrest
- TP-Link
Just measure the base diameter of your specific camera and its cable layout. Modify the STL file or create your own model accordingly.
Benefits of Custom 3d-Printed Mounts
- No more one-size-fits-all compromises
- Better cable management
- Can match the wall or room colour
- Eco-friendly, print: print only what you need
- Faster upgrades and repairs
You’ll feel more in control of your setup and improve your camera’s coverage.
Creative Mounting Ideas
- Ceiling corners for full room views
- Fence poles with clamp-style holders
- Tree trunks for backyard views
- Brick walls using adhesive screw anchors
- Desktop mounts for testing setups indoors
Thanks to 3D printing, your options are wide open.
How Long Does It Take to Print?
Print time depends on design complexity. Basic models with one axis of movement take about 2–4 hours. More complex ones with hinges or screw locks might take 6–8 hours.
How Much Does It Cost?
On average, printing a bullet camera holder uses 30–60 grams of filament, which equals $0.50 to $2.00 in material. Way cheaper than buying a commercial mount that can cost $10–$25 or more.
A Note on Safety and Stability
Always test your mount before installing it fully. Make sure it supports the camera’s weight and holds the angle you want. Reinforce it with metal screws or zip ties for extra support in windy areas.
If you’re placing the mount high or in public view, consider adding a tamper-proof cover or using a lockable joint.
READ MORE – Board Game Clip 3d Print: The Future of Tabletop Upgrades
FAQs:
1. Can 3d-printed camera holders support outdoor conditions?
Yes, if printed with PETG, ASA, or ABS. These materials resist UV and moisture better than PLA.
2. How do I know the holder will fit my camera?
Measure the diameter of your camera and its mounting points. Choose or design a model based on those specs.
3. Is it safe to use 3D printed mounts for security cameras?
Yes. With solid design and strong material, printed holders are just as reliable as commercial ones.
4. What printer settings are best for strong mounts?
Use 0.2mm layer height, 50-100% infill, and slow print speed for better strength.
5. Can I paint my 3D printed mount?
Absolutely. Use spray paint designed for plastics. Sand and prime it first for a smooth finish.
Conclusion
3D printing a bullet camera holder is a smart, flexible, and budget-friendly way to upgrade your home security setup. It allows you to create a perfect fit for your specific camera, improve installation angles, and maintain a clean and professional appearance, whether indoors or outdoors. With just a few tools and the right filament, you can print a durable mount that saves money and outperforms many store-bought options. Whether you’re protecting your home, office, or garage, a custom 3d-printed holder gives you more control over your surveillance setup. Start simple, test your prints, and don’t be afraid to tweak your design. Once you get the hang of it, you’ll wonder why you didn’t start sooner. Your security, your way—designed by you, built at home.


