Introduction
In the realm of precision machining and woodworking, a consistent router jig greatly improves accuracy and efficiency. As 3D printing develops, both experts and enthusiasts can now create a unique Torx 25 router jig. This article will show how to design, print, and utilize a 3D-printed Torx 25 router jig thereby guaranteeing accuracy in every cut and so lowering dependency on expensive pre-manufactured jigs.
Why Use a Torx 25 Router Jig Made in 3D-Printing?
1. Affordable Fix for Cost
Classic router jigs can be costly. Custom Torx 25 router jig 3D printing lets users save money while preserving accuracy and usefulness.
2. Personalization and Flexibility
A 3D-printed jig can be created to match particular project requirements, therefore guaranteeing a flawless fit for many router models and workpieces, unlike conventional jigs.
3. High repeatability and precision
Highly accurate, repeatable designs made possible by 3D printing help to guarantee that every jig runs consistently free from manufacturing flaws.
4. Portable & Lightweight
Being lighter than metal or wooden substitutes, a 3D-printed router jig is simple to move and store.
Choosing the Right Material for a 3D-Printed Router Jig
Ensuring lifetime, rigidity, and durability in your jig depends on choosing the right filament or resin.
1. Polylactic Acid, or PLA:
- Good dimensions precision and simple printing ease are pros.
- Cons: low heat resistance; brittle.
2. PETG—Polyethylene Terephthalate Glycol-Modified
- Stronger than PLA, more flexible, stronger impact resistant.
- Cons: Needs higher printing temperatures.
3. ABS (Acrylonitrile Butadiene Styrene)
- Pros: High durability, and better heat resistance.
- Cons: Prone to warping, requires a heated enclosure.
4. Nylon
- Pros: Extremely durable, great for industrial applications.
- Cons: Absorbs moisture, and requires high print temperatures.
5. Resin (SLA Printing)
- Pros: High detail precision, excellent for intricate designs.
- Cons: Brittle compared to FDM materials, requires post-curing.
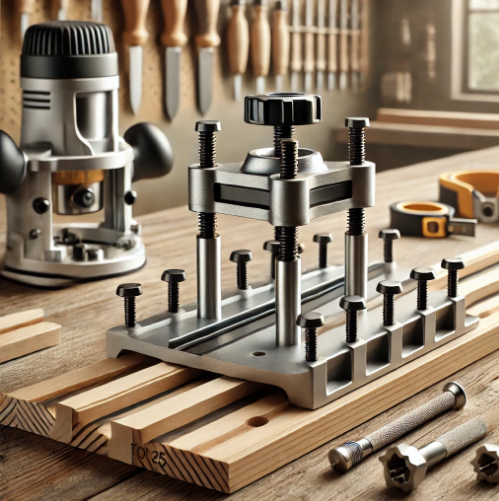
Designing a 3D-printed Torx 25 Router Jig
Creating a functional, well-designed router jig involves careful planning and precision.
1. Measuring Your Router and Workpiece
- Ensure the Torx 25 fitting aligns perfectly with your router.
- Measure and define cutout paths for various router sizes.
2. Using CAD Software
- Recommended programs: Fusion 360, TinkerCAD, FreeCAD.
- Design jigs with guide rails, clamping areas, and Torx 25 screw holes.
3. Strengthening the Design
- Add reinforcement ribs to prevent flexing.
- Use filleted edges for better stress distribution.
4. Exporting and Slicing the Model
- Save the STL file.
- Import it into Cura, PrusaSlicer, or Simplify3D.
- Adjust settings for optimal print quality.
Best 3D Printing Settings for a Router Jig
1. Nozzle Size
- 0.4mm to 0.6mm nozzle for balance between detail and strength.
2. Layer Height
- 0.2mm layer height for good resolution.
- 0.3mm for faster prints.
3. Infill Density
- 40-60% infill for strong but lightweight parts.
4. Print Speed
- 50-70mm/s to avoid print failures.
5. Bed Adhesion
- Use a heated bed for PETG, ABS, and Nylon.
- Apply a glue stick or PEI sheet for improved first-layer adhesion.
Post-Processing & Assembly
1. Sanding and Smoothing
- Remove layer lines using fine-grit sandpaper.
- Apply acetone smoothing for ABS prints.
2. Reinforcing the Jig
- Consider epoxy coating or metal inserts for added strength.
- Use Torx 25 screws for secure fastening.
3. Testing & Adjustments
- Fit the jig onto the router and test precision.
- Make necessary design tweaks and reprint if needed.
How to Use a 3D-Printed Torx 25 Router Jig
Step 1: Secure the Jig
- Clamp the jig onto your workpiece.
- Ensure the Torx 25 slots align properly.
Step 2: Set Up Your Router
- Adjust router depth and speed based on material type.
- Lock the router bit securely.
Step 3: Route the Workpiece
- Follow the guide rails of the 3D-printed jig.
- Maintain steady pressure for clean cuts.
Step 4: Evaluate the Cut
- Check for accuracy and repeatability.
- Modify jig settings if necessary.
READ MORE – 3D Print Toilet Paper Roll: The Ultimate Guide to Printing Custom Holders and Accessories
FAQs
1. Can a 3D-printed router jig withstand heavy use?
Yes, when printed with PETG, ABS, or Nylon, the jig can endure moderate to heavy workloads.
2. How do I prevent my 3D-printed jig from breaking?
Reinforce stress points, increase wall thickness, and print with higher infill percentages.
3. Can I print a router jig with a budget 3D printer?
Yes, most FDM 3D printers can handle router jig designs, but ensure proper calibration.
4. Is it better to 3D print a router jig or buy a commercial one?
The greatest choice if you want customizing is 3D printing. Commercial jigs do, however, have more durability.
5. In a 3D-printed jig, how best can accuracy be raised?
Apply strict tolerances in post-processing methods, high-resolution printing, and CAD.
Conclusion:
An outstanding approach to improve accuracy and customizing in woodworking tasks is 3D-printing a Torx 25 router jig. A 3D-printed router jig can be as functional as commercially sold ones with the correct materials, print settings, and reinforcing procedures. Whether you enjoy do-it-yourself projects or work as a professional woodworker, this tutorial offers the information required to produce a premium, useful Torx 25 router jig.


